
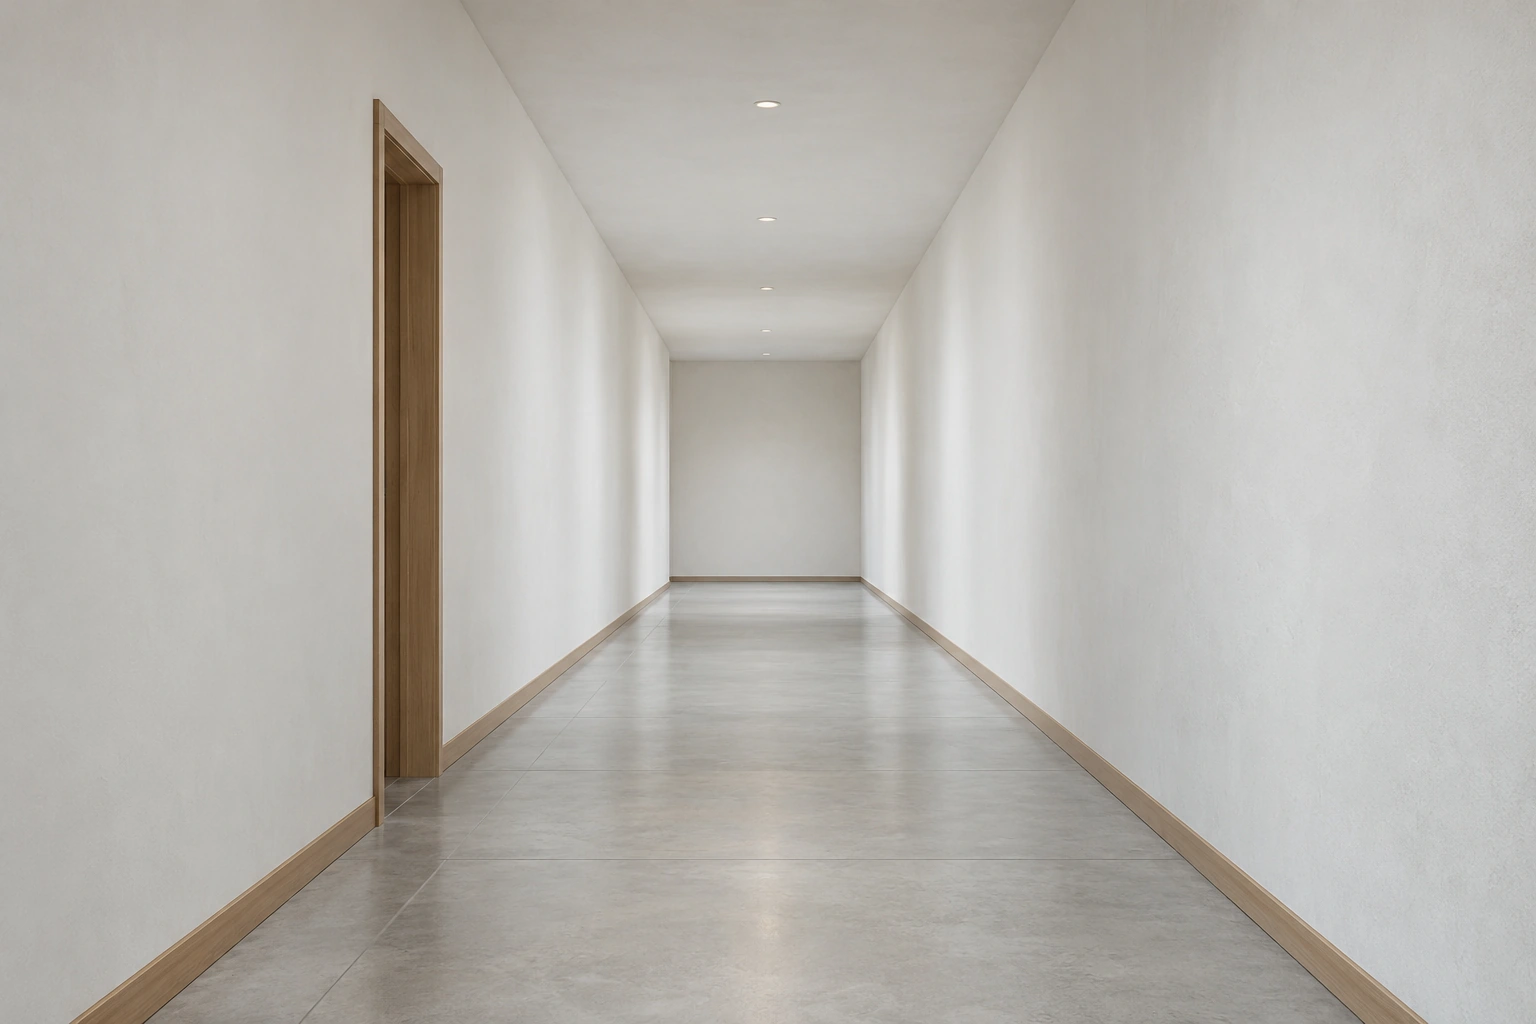
One-point perspective helps depict a space viewed along one main direction. In a corridor exercise, lines receding into depth meet at one vanishing point. Vertical lines remain vertical, while horizontal lines on the front-facing plane remain parallel to the horizon.
Prepare paper, a pencil, an eraser and a ruler. Keep construction lines light so they can be corrected. Begin with an empty corridor viewed straight ahead. Avoid introducing angled doors or a second room direction until the main framework is understandable.
Set the horizon and one vanishing point
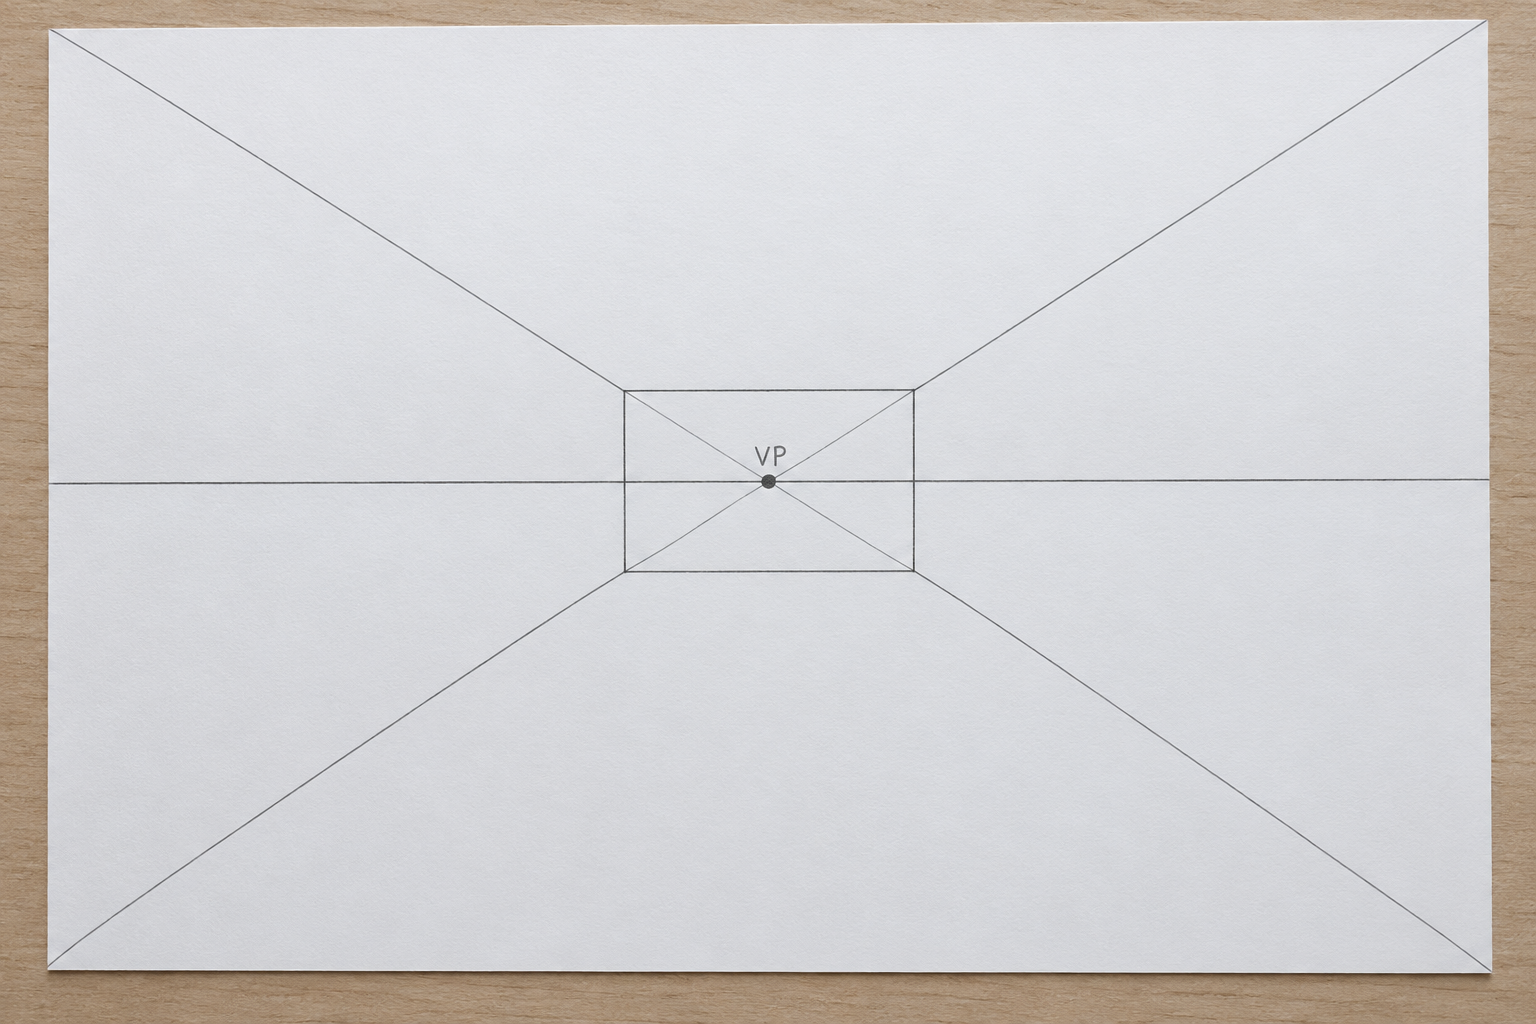
Draw a rectangular picture boundary. Place a horizontal horizon line inside it and mark one vanishing point. For the first attempt, keep that point near the centre so the depth direction is easy to recognise. In this arrangement, the horizon represents eye level.
Draw a smaller rectangle for the back wall, with the vanishing point inside it. Its top and bottom remain horizontal; its left and right sides remain vertical. The horizon may cross this wall as a construction line.
The Make a Mark Studios one-point perspective guide explains the relationship between horizon, vanishing point and line directions. For this corridor, keep the same point throughout. Do not quietly move it when one part of the drawing looks awkward.
Construct the floor, walls, and ceiling
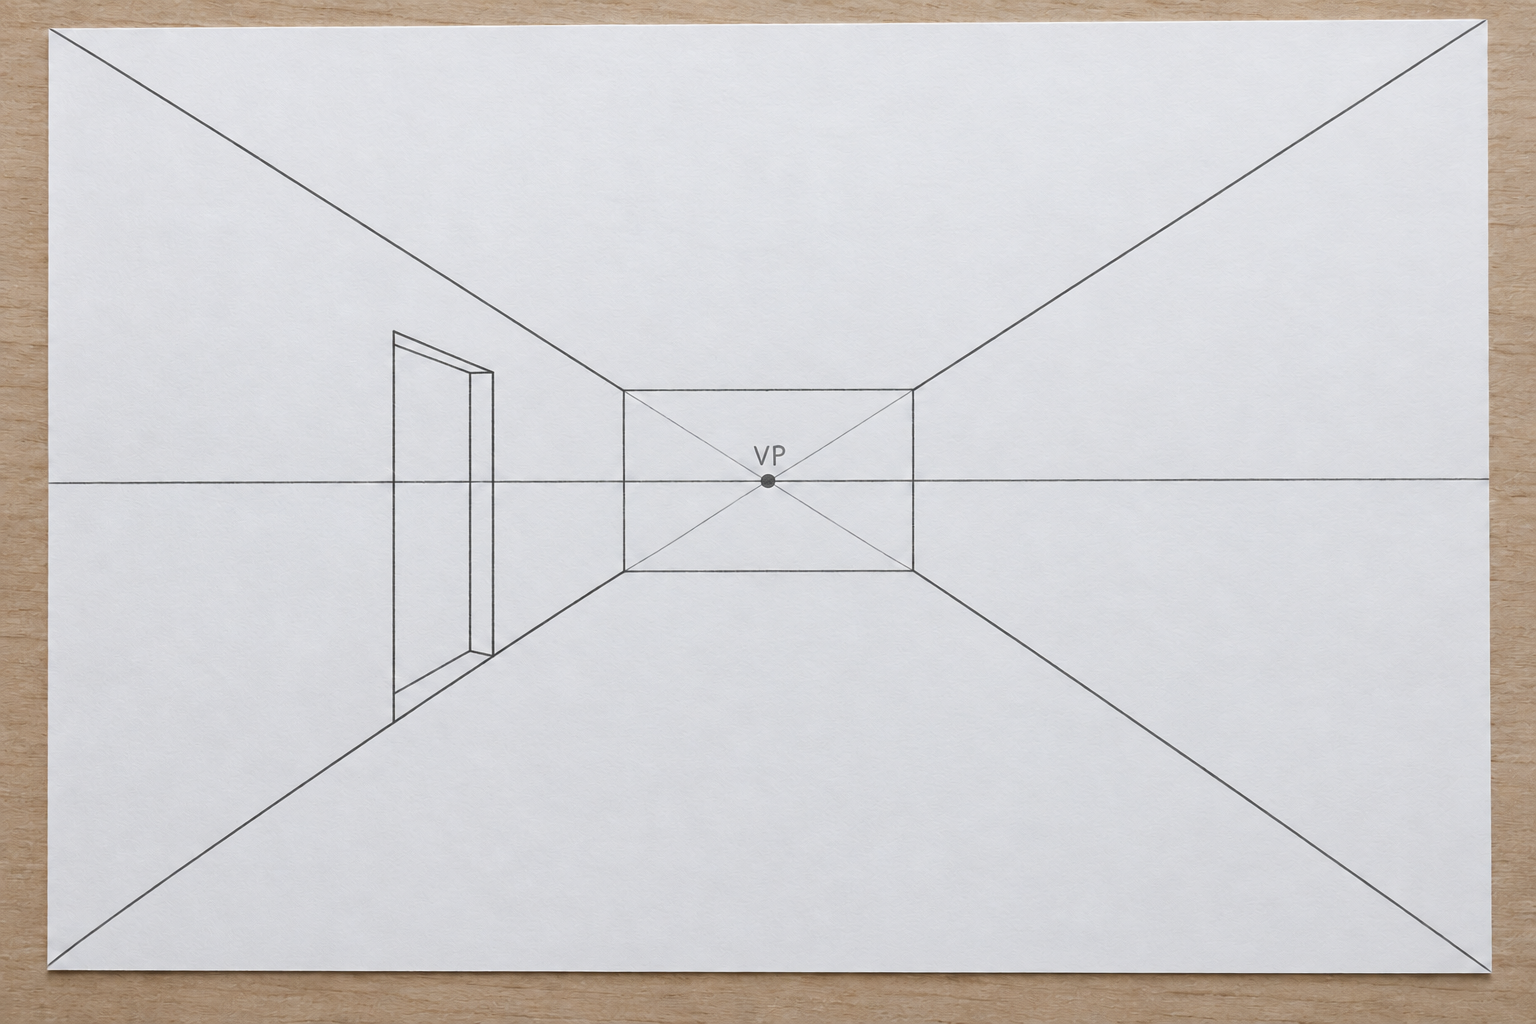
From the vanishing point, draw through each back-wall corner and extend the line to the picture boundary. These intersections do not need to coincide with the outer picture corners. All four depth directions still refer to the same vanishing point.
The area below the back wall becomes the floor, the area above becomes the ceiling, and the sides become corridor walls. Understand that division before adding objects. If a plane appears reversed, check the corner connections and back-wall placement first.
Add one vertical line on a side wall to mark the near edge of a doorway. The doorway’s receding top and bottom follow directions towards the vanishing point. A door on the back wall behaves differently because it sits on the plane facing the viewer.
Add repetition gradually
Choose one kind of detail first, such as a few floor divisions or two door openings. Too much detail makes directional errors harder to find. Use light guides to relate each detail to the plane supporting it.
On the floor, receding lines follow the vanishing point. Crosswise lines remain horizontal in this straight corridor arrangement. Apparent spacing compresses towards the back; do not repeat identical gaps on the paper and expect them to depict equal depth.
This first exercise concentrates on direction and spatial relationships rather than measured architectural distances. For precisely equal floor tiles, study perspective measurement construction separately. An estimated division should not be described as a scaled technical drawing.
Check directions before adding detail
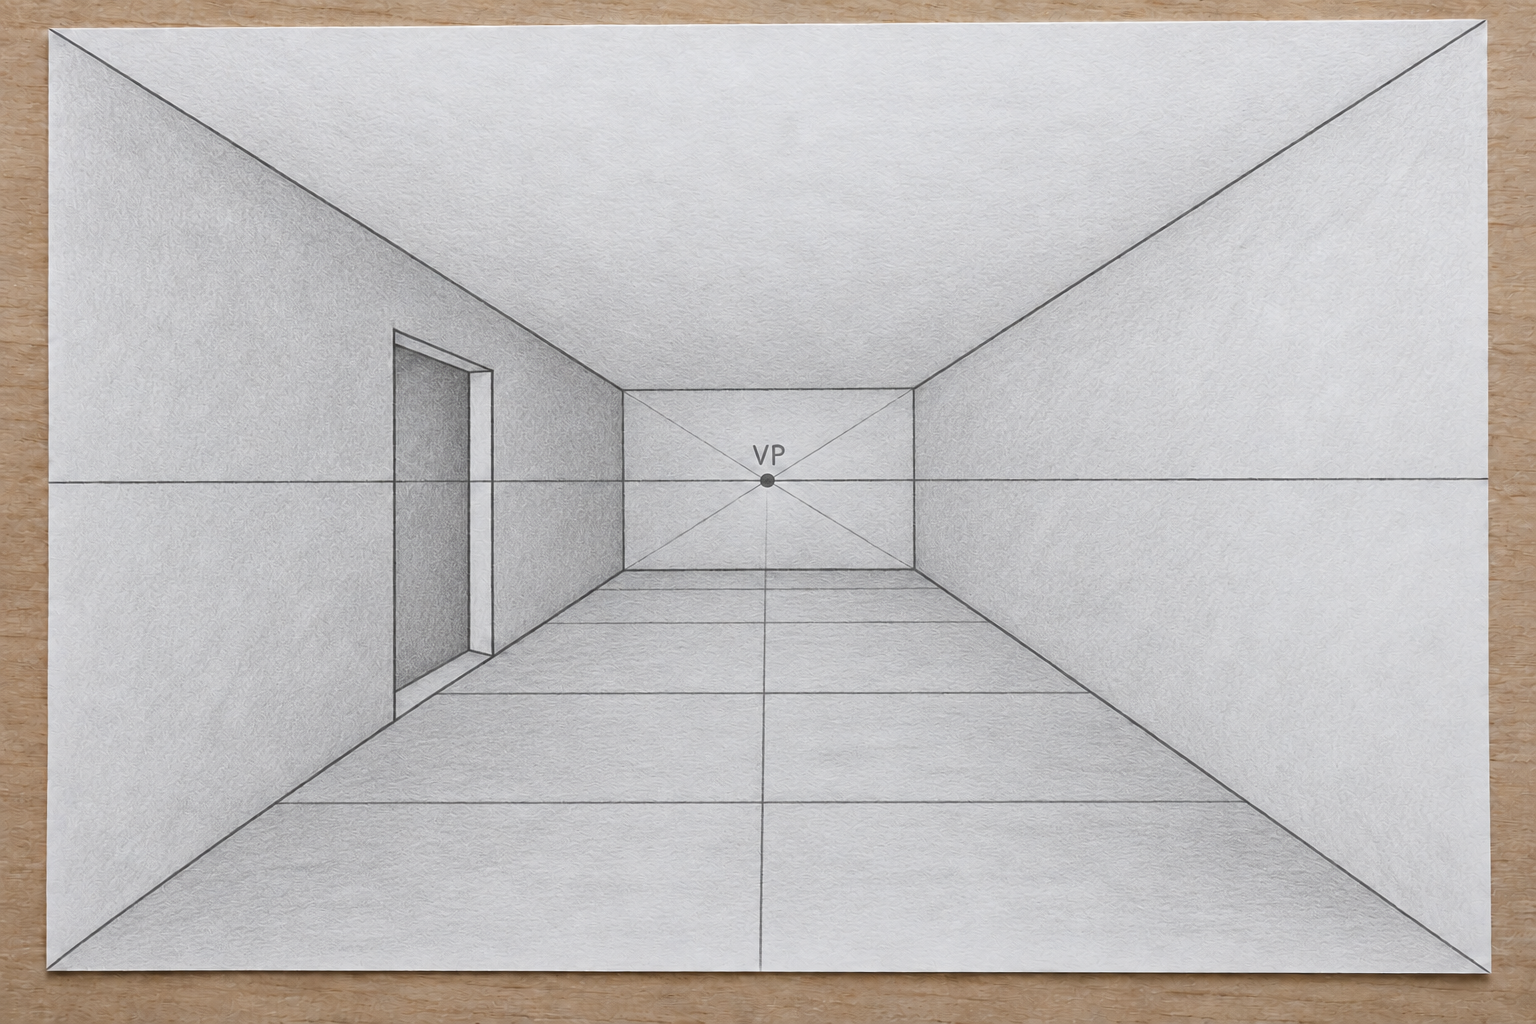
Place the ruler along a receding edge. Imagine, or lightly draw, its extension towards the vanishing point. Check floor edges, ceiling edges and doorway details. Correct a line heading elsewhere before strengthening the drawing.
Check verticals too. In this one-point view, upright sides do not tilt towards the vanishing point. A common mistake is sending every line there, including lines that should remain vertical or horizontal.
Once the framework reads clearly, erase unnecessary construction lines. Strengthen principal edges moderately and add a light distinction between floor, walls and ceiling. Avoid using dark shading to hide a junction that is still unresolved.
Compare two attempts with one change
Make a second version with a higher or lower horizon while keeping the exercise simple. Observe how the visible floor and ceiling change. Alter one element so the relationship between cause and outcome remains clear.
Another experiment can move the vanishing point slightly left or right along the horizon. Do not simultaneously change every dimension, doorway count and light source. The aim is to study viewpoint, rather than produce two drawings with no comparable features.
Keep a short note about the difficult part. Was it maintaining verticals, joining corners or limiting detail? That note helps select the next exercise instead of repeating an entire drawing without knowing what needs improvement.
Observe real spaces after learning the framework
Find a corridor or room that can be observed comfortably and examine its edges. Not every photograph is a suitable simple one-point reference: the camera angle may reveal several spatial directions. Choose a straight-ahead view for early practice.
The cardboard viewfinder exercise can help limit the section of space being observed. Use the frame to select a composition, then distinguish visible edges from construction lines added to understand them.
Visit Zumen for the context of available drawing activities. For independent practice, completing one corridor with consistent directions is enough. A readable framework offers a stronger basis for later detail than a crowded picture whose vanishing point keeps changing.