
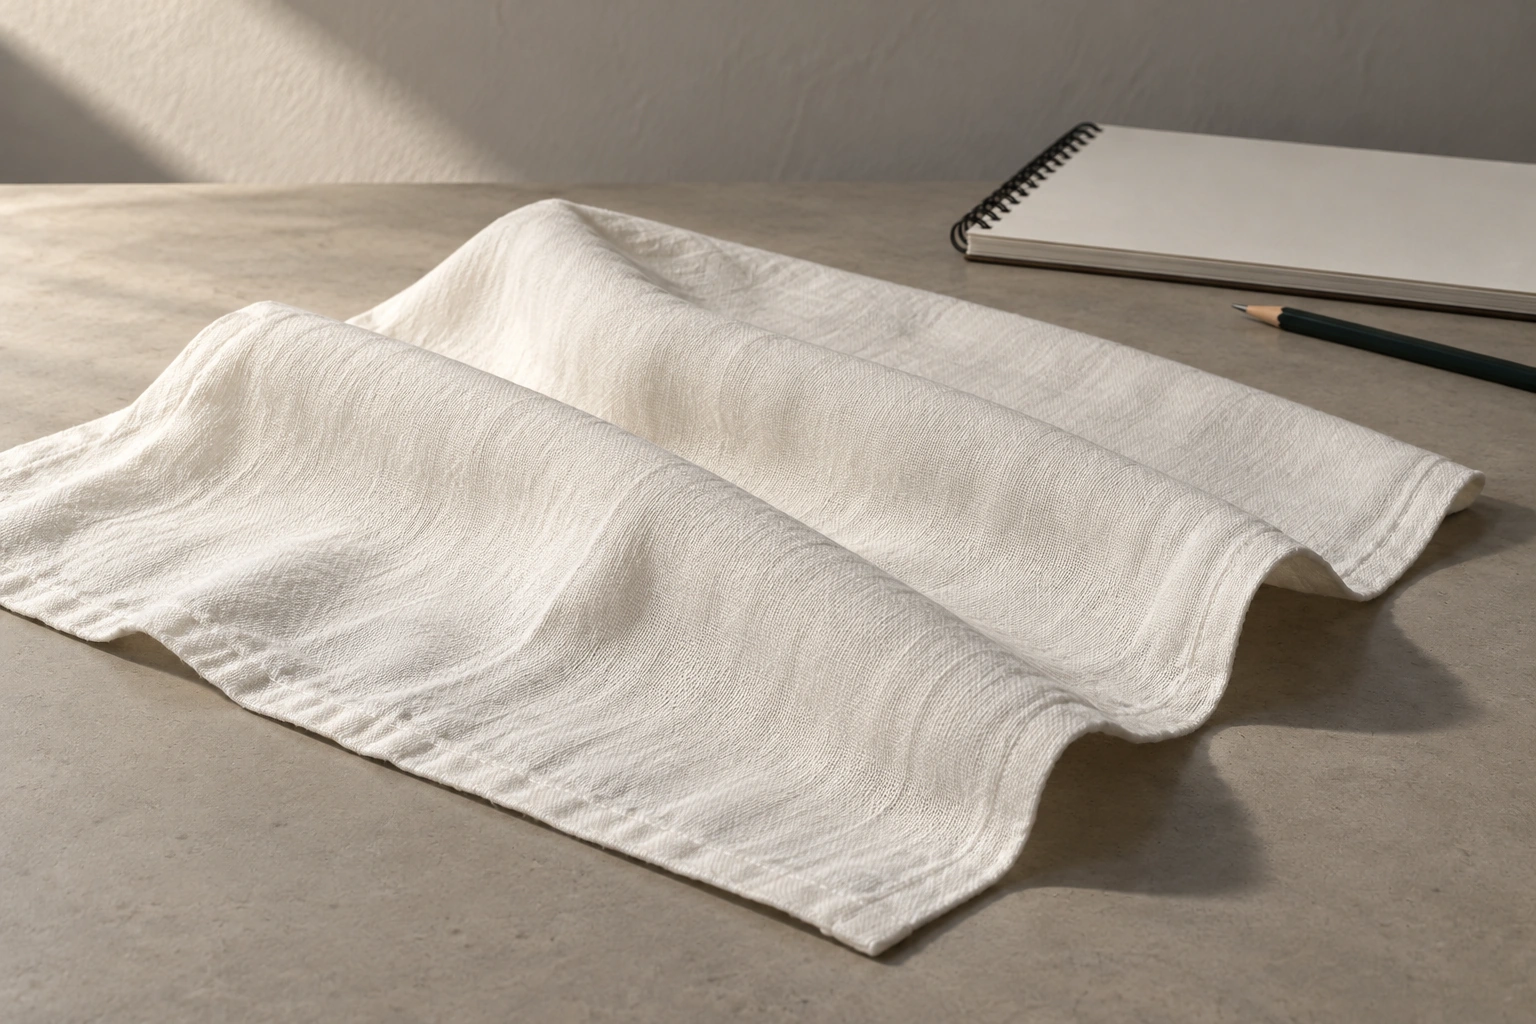
Drawing cloth folds becomes easier when you distinguish form shadows from cast shadows. A form shadow occurs as a surface turns away from the light. A cast shadow occurs where part of the cloth blocks light from reaching another surface. The distinction helps you decide where a dark area belongs and how its edge should look.
For this exercise, use plain, light-coloured cotton, drawing paper and a graphite pencil. Arrange two broad folds on a table with light coming from one side. Two folds provide enough relationships to study without filling the drawing with small details from the start.
Arrange a subject that will stay in place
Choose a fabric that is not particularly shiny so changes in value are easier to follow. Avoid a busy pattern for the first attempt. The exercise concerns turning surfaces and relationships between shadows, rather than reproducing a design printed on the cloth.
Place one fold slightly in front of the other and choose your viewing position. A small mark on the table covering can help you keep that position. Once drawing begins, preserve the arrangement: pulling one cloth corner may change several relationships at the same time.
Check the light source. If competing lamps create confusing directions, simplify the lighting until one direction is clear. There is no need to force every shadow into a very dark tone. First identify the light areas, surfaces turning away and places obscured by another fold.
Find shadows on the form and beneath the folds
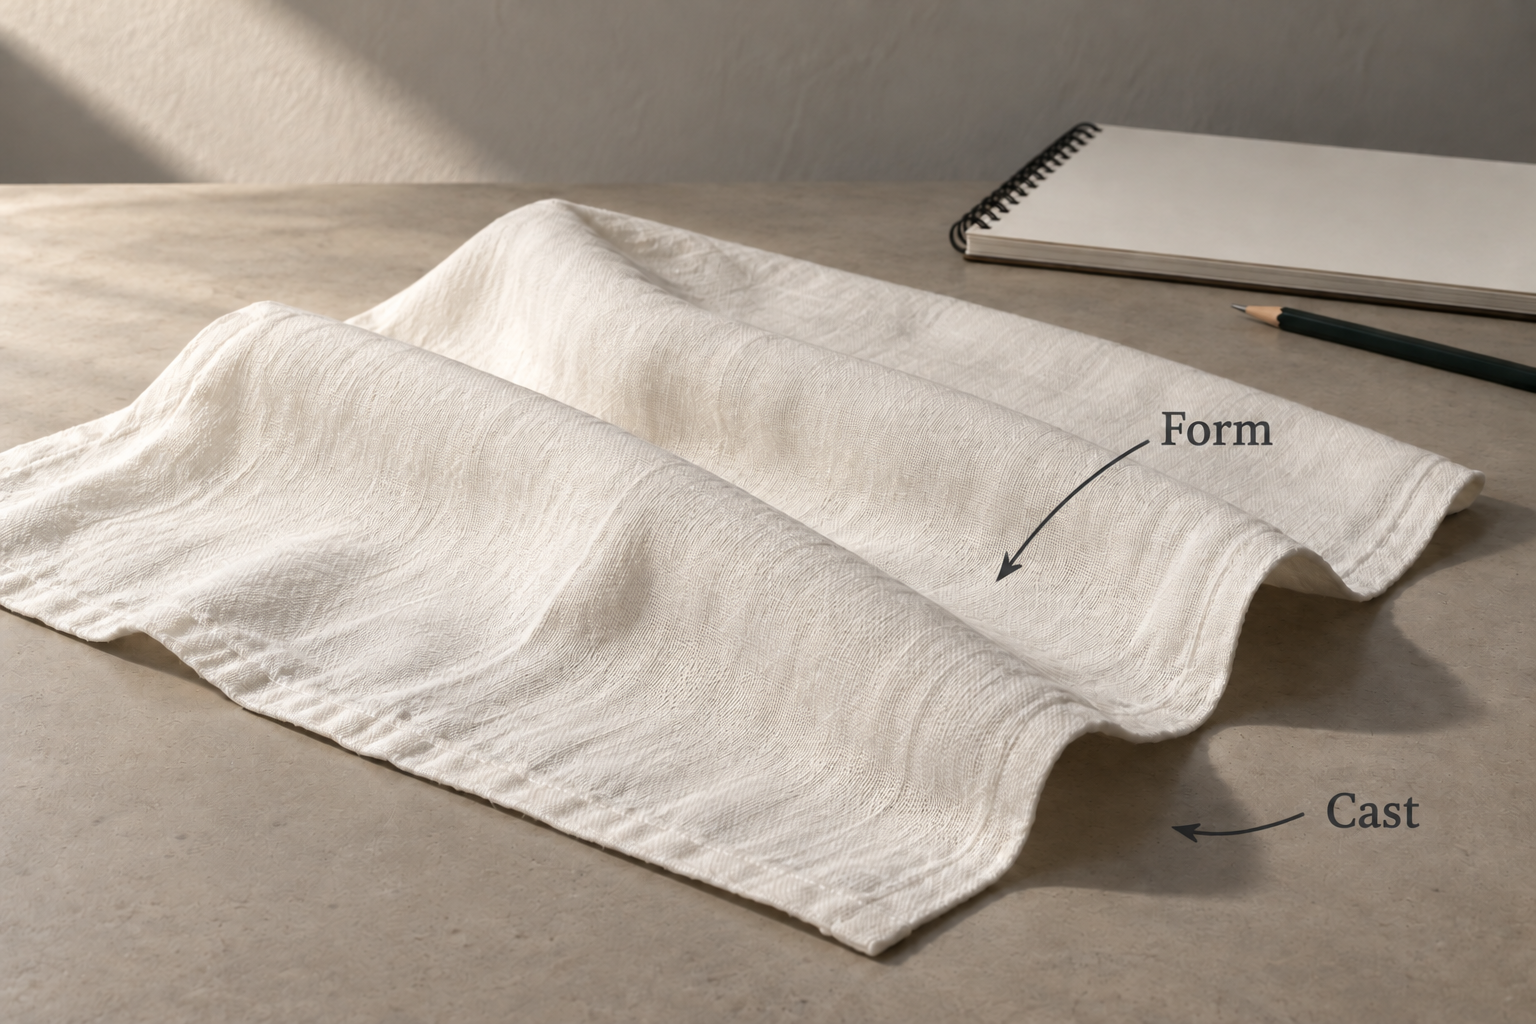
Follow the surface from a fold’s crest down its side. If it gradually appears darker as it turns away from the light, you are observing a change across the form. Beneath a fold that covers another surface, look for the shadow caused by that obstruction.
Carrie L. Lewis explains the two shadow types in her cloth-drawing lesson. Use their different causes to guide observation. Do not turn this into a rule that every cast-shadow edge must be sharp: look at the actual subject and lighting in front of you.
Point to one dark area and ask two questions. Is this surface turning away from the light, or is another piece of cloth blocking the light reaching it? Both may occur close together. Understanding the cause helps prevent the same black outline being used indiscriminately for every fold.
Build the drawing with three value groups
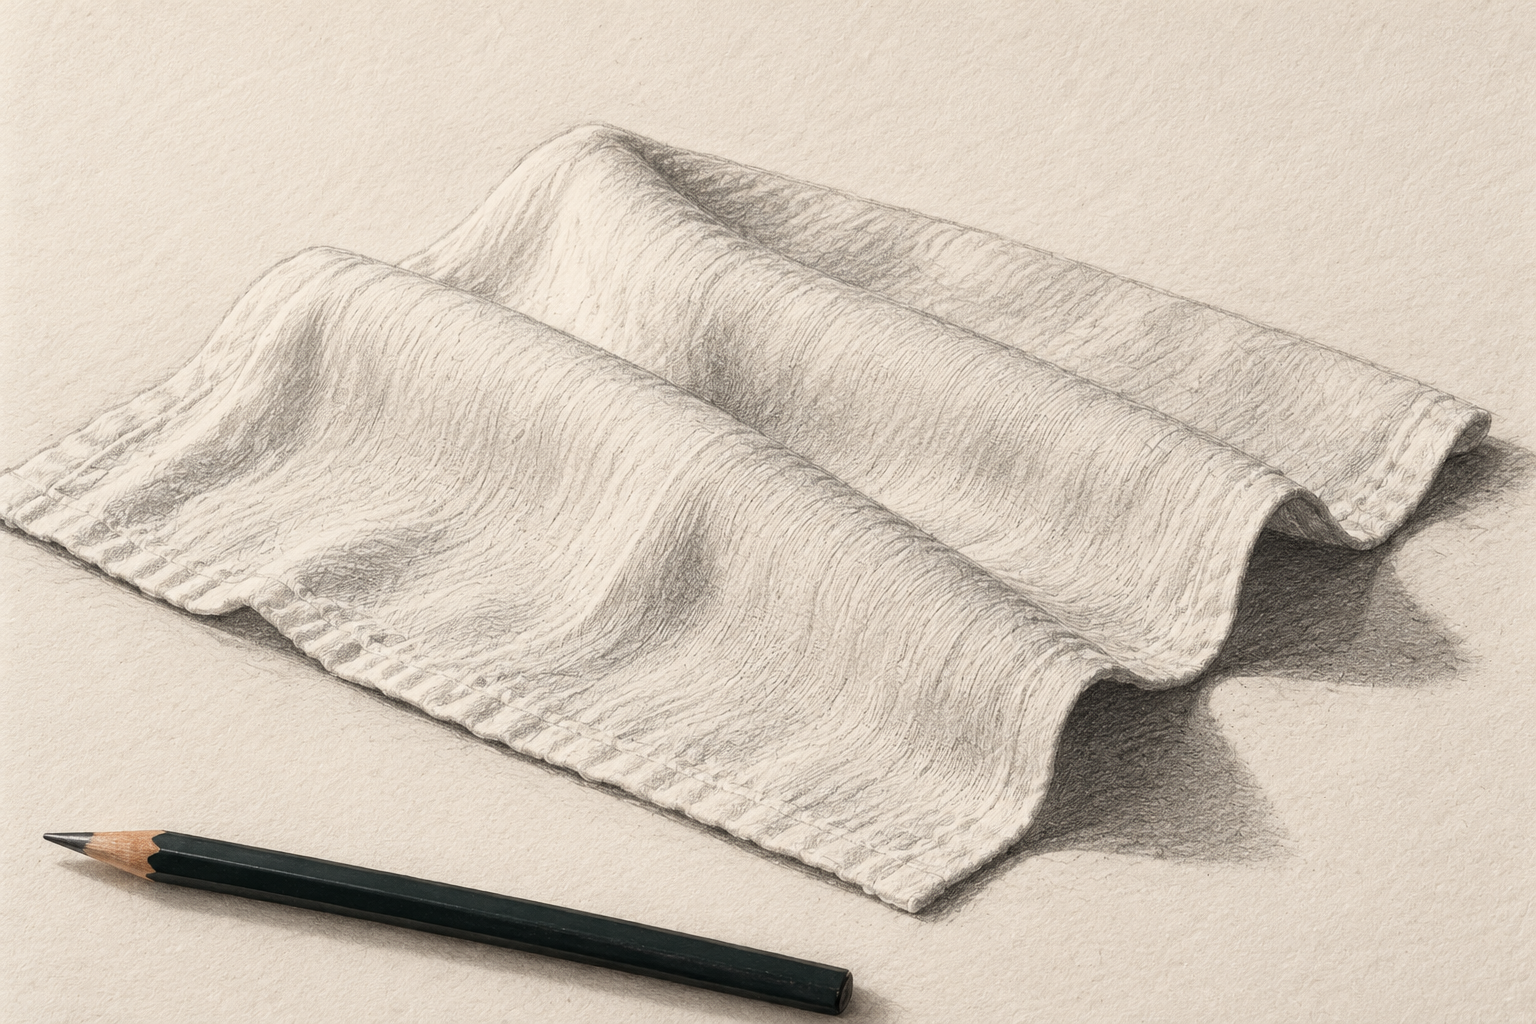
Make a light sketch of the cloth boundary and the direction of the two main folds. Then organise your observations into light, middle and dark groups. This is a simplification for reading form, rather than a claim that the subject contains only three shades.
Leave the brightest group as paper, apply light graphite to the middle group and build the dark group gradually. Compare the area occupied by each shape. A shadow in the right position but much too wide can make a fold appear heavier than the subject.
The example drawing follows the same cloth arrangement under the same light direction. Check the crests and bases before adding more shading. If your own arrangement differs, follow your observation rather than forcing the example’s shadow shapes onto a different subject.
Adjust edges before adding details
Choose a transition between light and dark that appears soft. Reduce the impression of a boundary line using gradual, light layers while preserving the value change. Choose a firmer shadow edge too, and retain the difference so the whole drawing does not become equally blurred.
Do not immediately darken every hollow if the form is difficult to read. First check the crest positions and whether the middle-value areas are broad enough. Sometimes the problem is not insufficient black, but a missing connecting surface between the light and dark groups.
| If the drawing feels like this | Check this relationship |
|---|---|
| Lines drawn on a flat surface | Have the middle-value planes been established? |
| Every fold looks sharply cut | Have all edges been made equally hard? |
| The form is difficult to follow | Do the crests and bases still match the subject? |
| The entire cloth looks dark | Have the light areas also been covered with graphite? |
Compare one area, then review the whole
Pause and view the drawing from a comfortable distance. Use one fold as a reference. Compare its direction, light-area width and dark relationship with the neighbouring fold. Adjust one clear relationship rather than erasing the entire study at once.
Afterwards, add two short observations beside the drawing: one shadow caused by a surface turning and one caused by blocked light. The notes identify decisions you made while drawing, rather than merely naming parts of the finished image.
For another study, keep the cloth in place and move the lamp direction. Finish the first drawing before changing the light. Compare which structures remain the same while their value groups change. This helps separate the fold’s structure from the light-and-dark pattern seen under one arrangement. Put any pointing marks outside the drawing so the notes do not cover the areas you want to study.
If making distinct values is still difficult, try the five-value graphite exercise before returning to the cloth. Later, repeat the observation with another fabric. Keep the lighting and viewpoint stable so the difference you study comes from the material itself.